
Now that the image is ready for processing in the previous section, it is time to start processing the image in Linear Space.
Color Calibration with SPCC

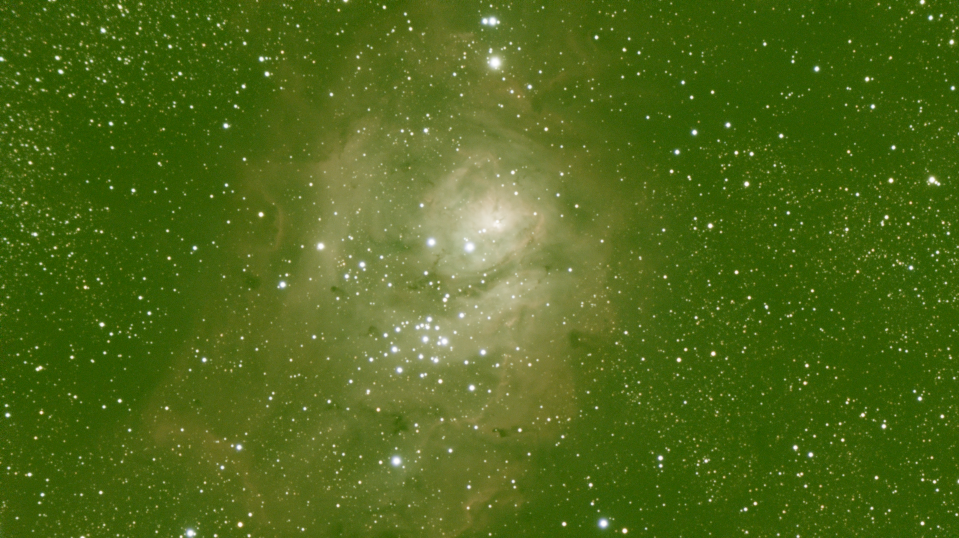
A recent addition to Pixinsight, the SpectrophotometicColorCalibration plugin has been a timesaver for getting the colors balanced correctly. If you recall, the image appears to have a yellow-green tint to it after we did the STF stretch.
SPCC will correct this. Open the SpectrophotometicColorCalibration plugin. The default values are fine. Select the “Box” button in the lower left hand corner of the dialog box.
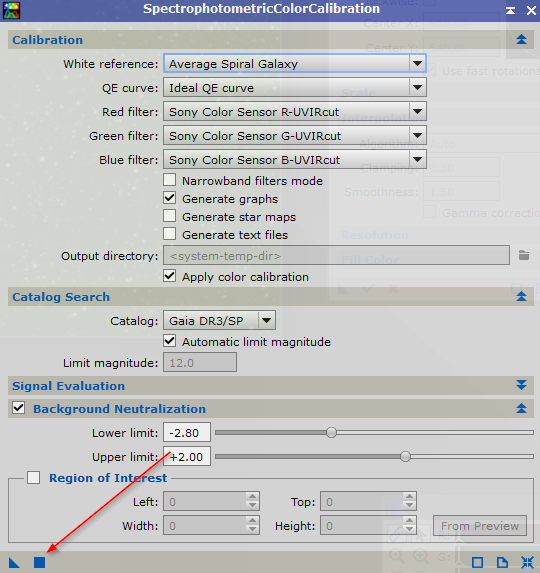
| NOTE: The Gaia DR3/SP database must be installed properly for this to work correctly. This was explained in the first session. |
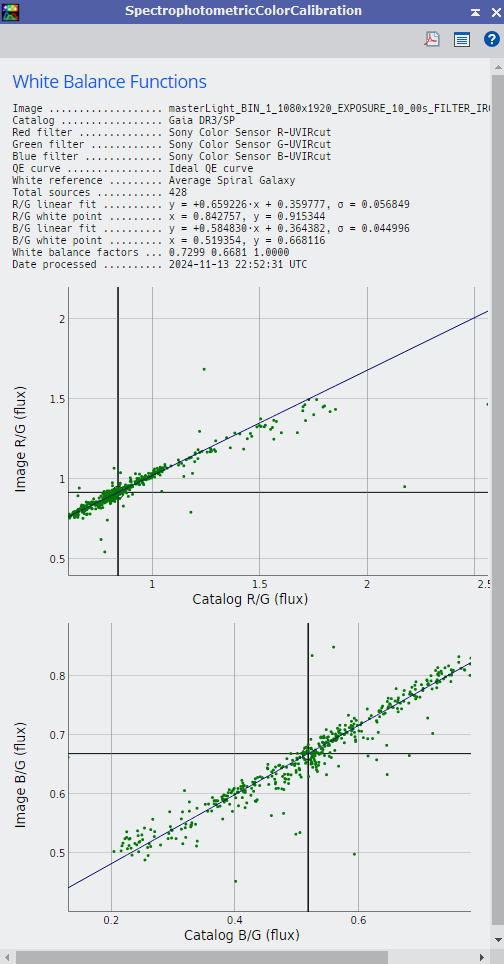
When finished, you will see a new window appear. This window displays a graph of the results. If the stars appear to follow the line, this indicates a good color calibration. You can close this window.
The image itself will appear as follows:
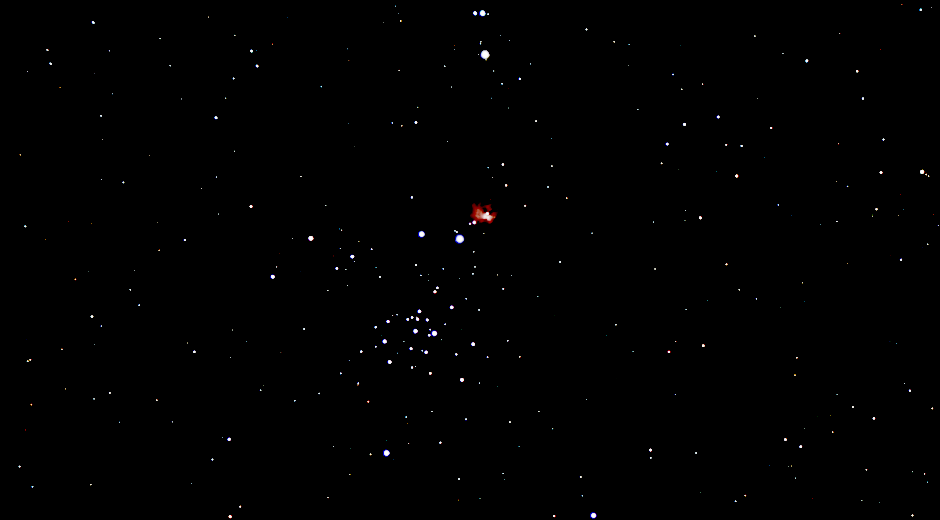
This is normal. We just need to reset the STF and reapply it. Open STF (if not already open) and do the following:
- Select the reset button.
- Select the Radiation Symbol
This will get your image back to normal.
Gradient Removal with Graxpert
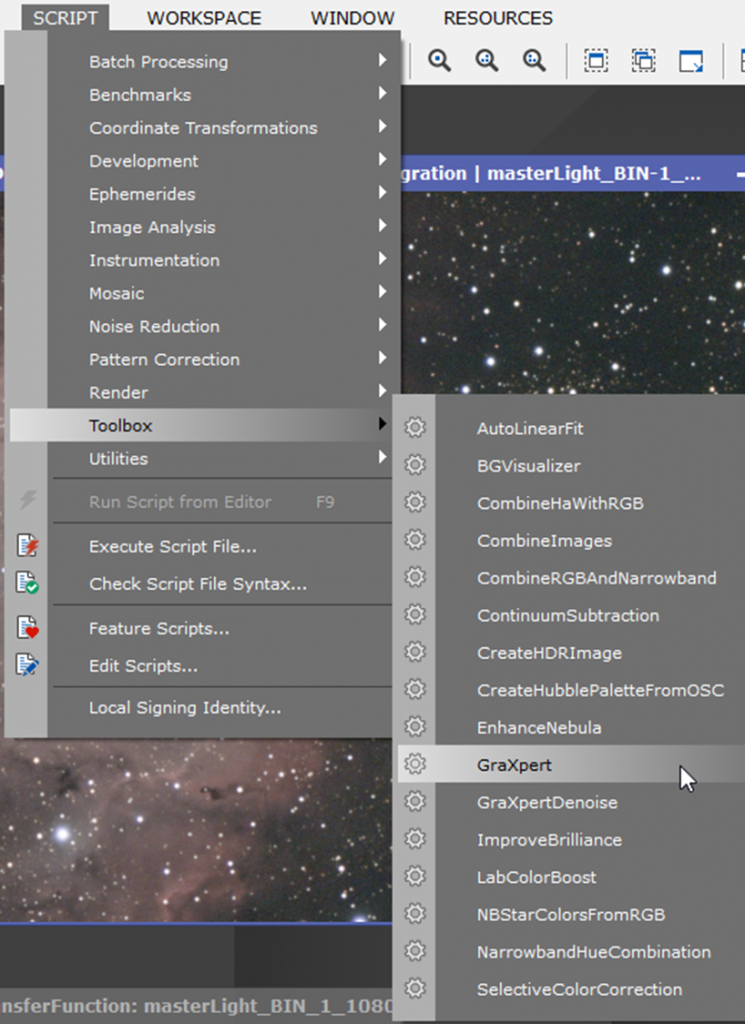
Graxpert is a free tool that uses AI to remove gradients (if present). To use Graxpert, select Scripts->Toolbox->GraXpert.
| NOTE: GraXpert must be installed and configured properly. This is covered in the first session. |
Select the Green checkmark button to apply the gradient removal.
If there are not any apparent gradients, this step can be optional.
BlurXTerminator
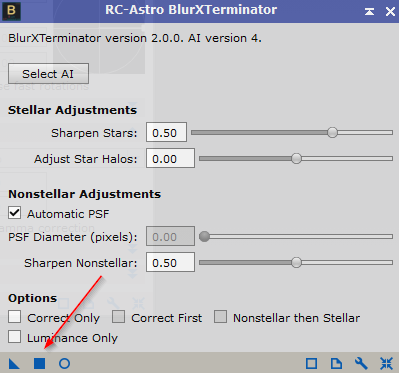
BlurXTerminator is a tool by RCAstro that is an excellent Deconvolution tool for Pixinsight. It sharpens the image in an intelligent way using AI. It also helps with Star bloating. Open the plugin and select the Square button in the bottom left. The defaults are usually adequate, but experiment with the different settings.
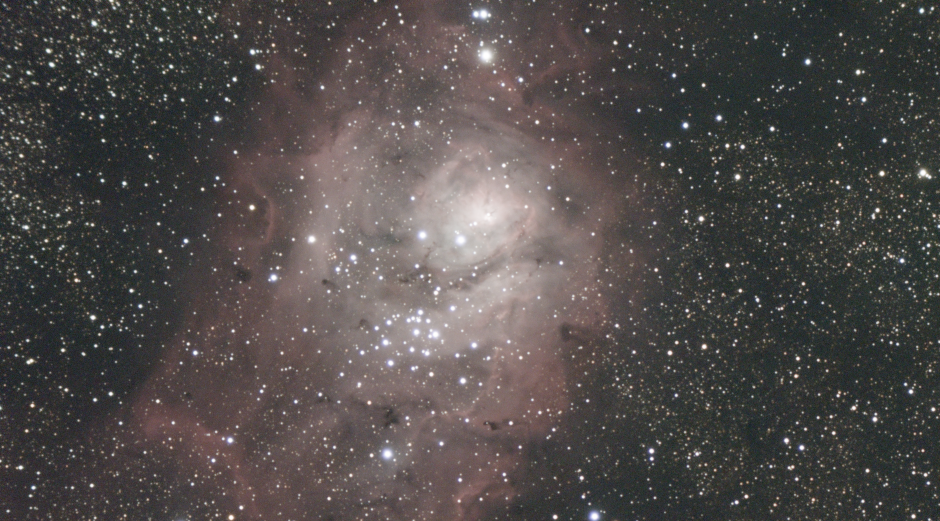
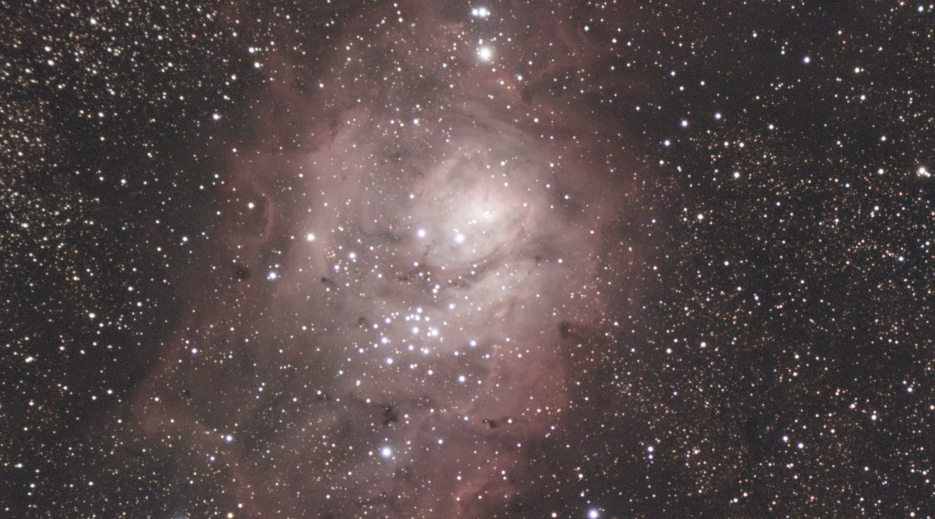
Here is a before and after using the BlurXTerminator plugin.
STF/Histogram Adjustment


It is time to move from the Linear Space to the Non-Linear Space where we will do the remainder of our processing. To do this, we will be using a combination of STF and HistogramTransformation. Open both plugins.
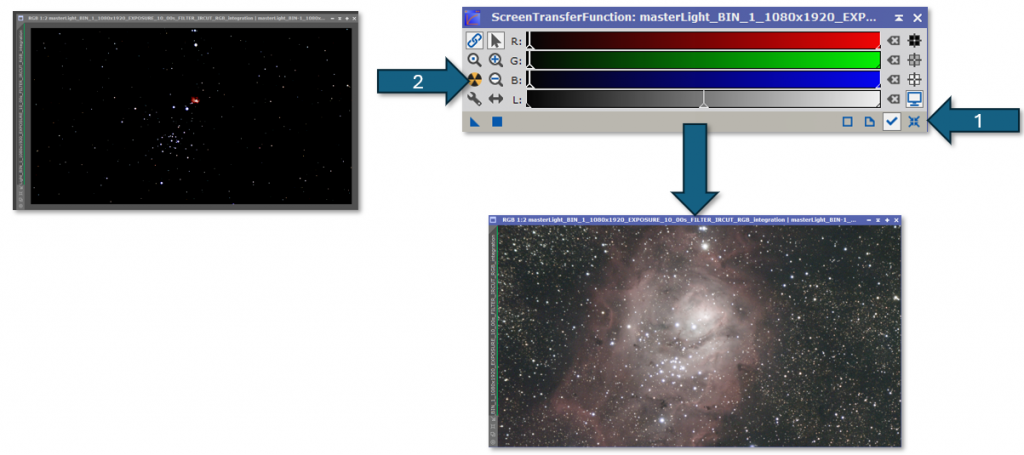
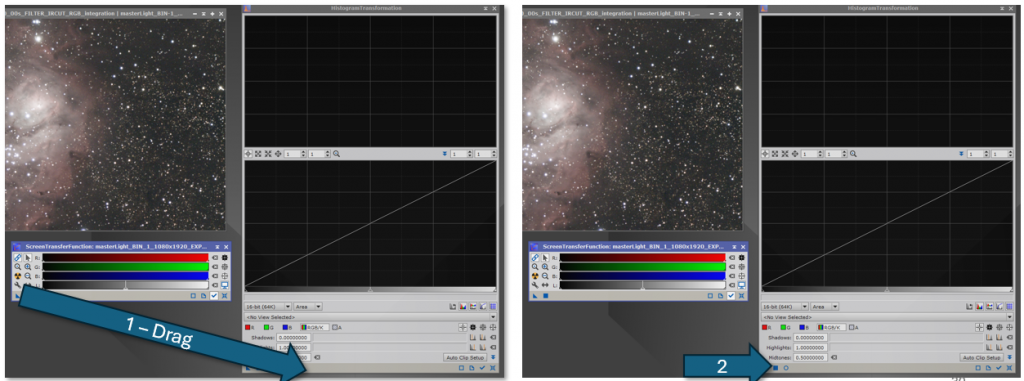
Since the image is already “stretched” (again, the underlying pixel values are not changed, it just appears that way), we can use the STF to apply the stretch permanently. This is done by 1) dragging the “triangle” button in the bottom left of the STF dialog to the empty area at the bottom of the HistogramTransformation dialog and 2) selecting the “Square” button at the bottom of the HistogramTransformation dialog.
Once this is done, the image will appear like this:

This is normal. The reason why this occurs is that the STF is still applied. To fix this, simply reset the STF to get it to appear normal.

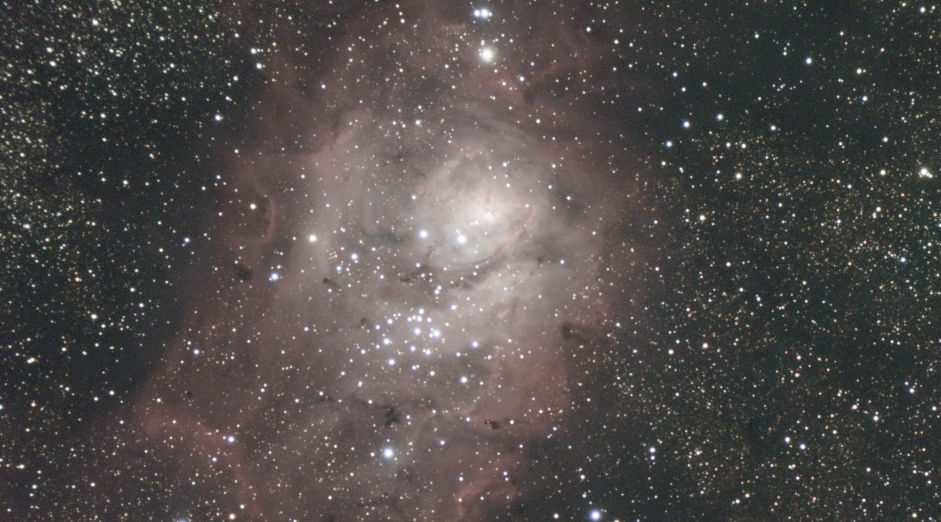
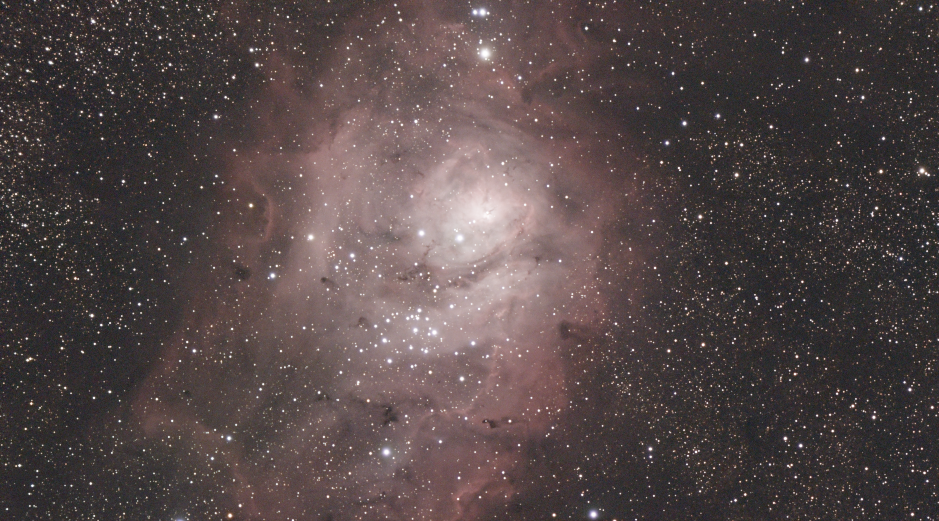
Your image should now look like this:

The image is now Non-Linear and we can move on to the Non-Linear Processing stage.