With the recent update from ZWO, the Seestar S50 now supports a new Mosaic Mode. This mode adds a new dimension to using the Seestar to expand beyond the field of view of the Seestar. In this article, we will be discussing the field of view available for Mosaic mode, and how to stack the images in Pixinsight.
This method originated from a video from The Space Koala. I wanted to illustrate it in a step by step format for clarity.
Default Field of View
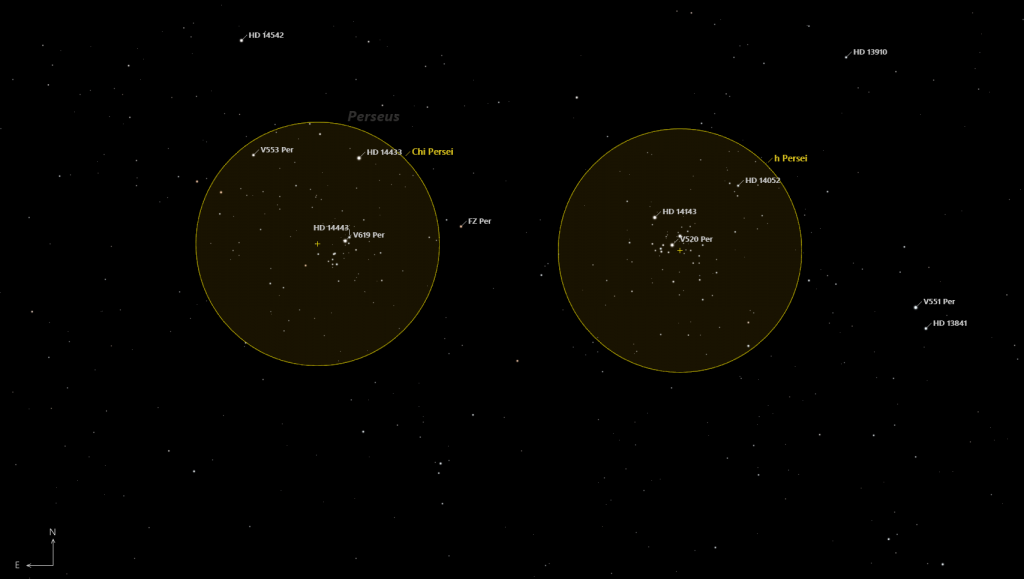
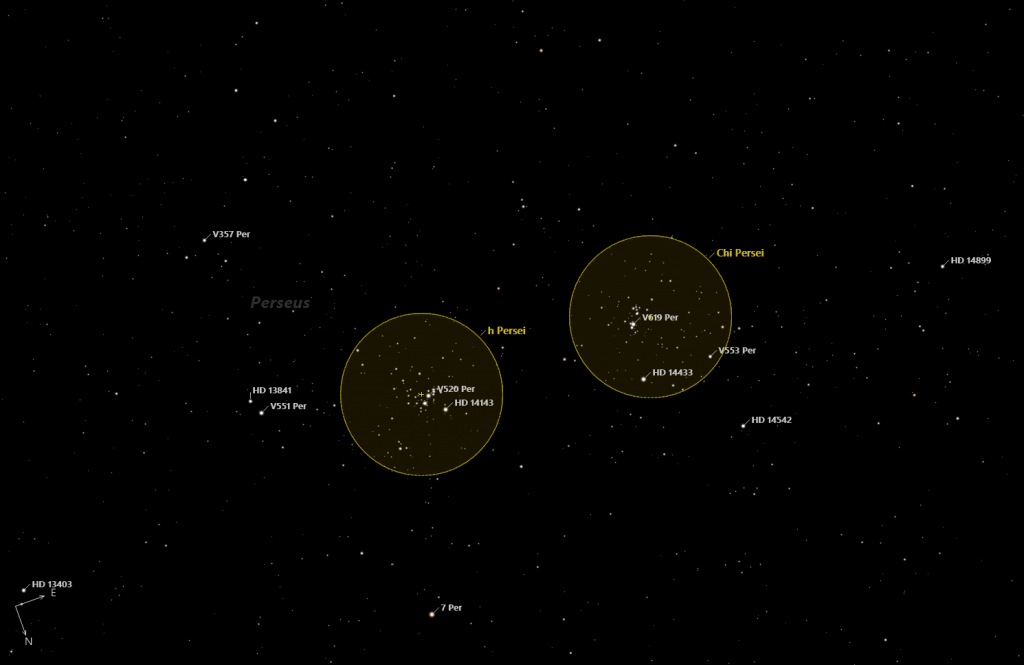
To give you an idea of how big the new Mosaic mode can be, I want to illustrate it using the Double Cluster.
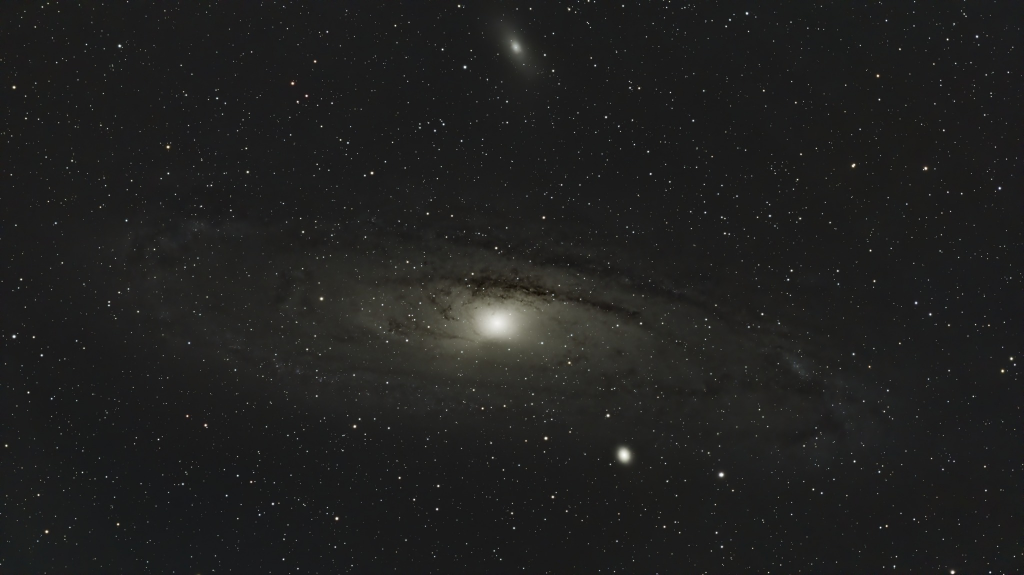
The default field of view of the Seestar is 0.93° x 0.69°. Here is the default field of view represented on a star map.
Here is an example of the default field of view from the Seestar.
Mosaic Field of View
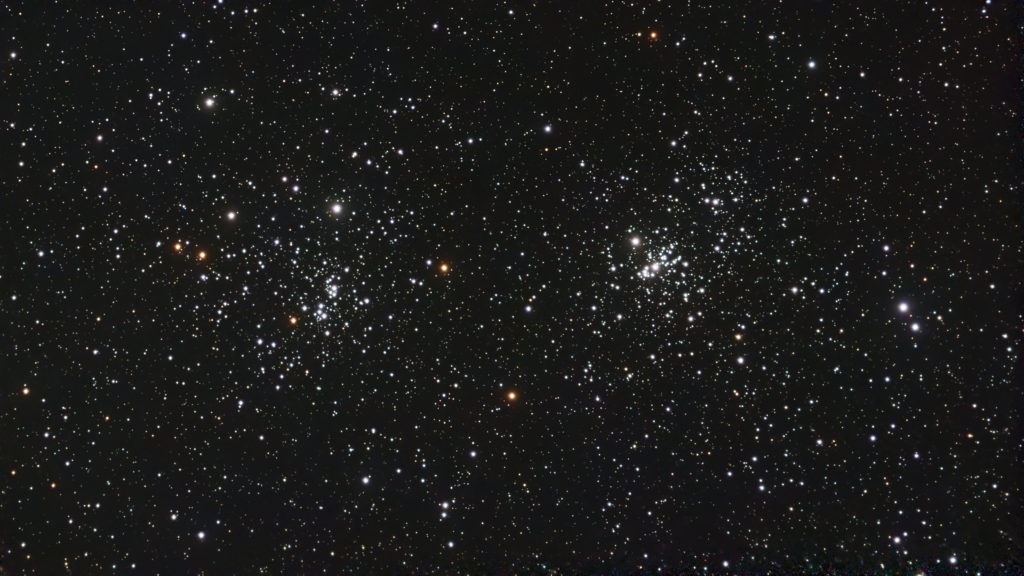
The maximum mosaic field of view is approximately 1.92° x 1.24°. The field of view in this example is slightly rotated (matching the example from the Seestar).
Example of the mosaic field of view from the Seestar.

Stacking
Normally, we would use Weighted Batched Pre-Processing (WBPP) but in this case, we will do each step manually. First start with debayering the light frames to get it into the RGB space, then we register using the mosaic image from the Seestar, and finally, integrate the light frames together.
Debayering
The first step is to debayer the light frames.

1) Open the debayer plugin, and add the raw light frames.
2) Set the output directory to store the debayered files.
3) The rest of the options can be the defaults.
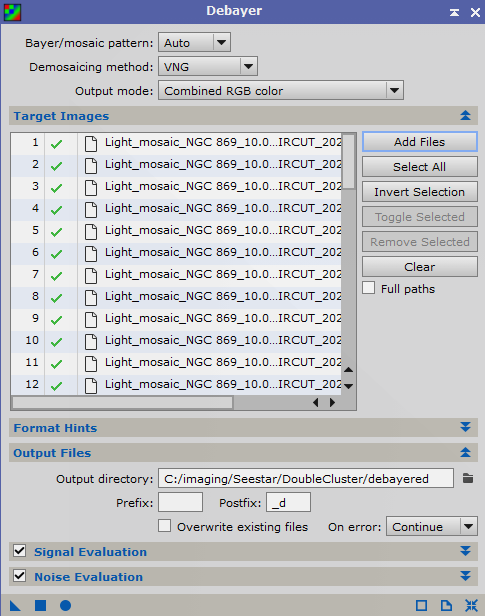
4) Select the Apply Global button (the round button at the bottom left).
Registering
After debayering, the next step is to do your star alignment using the star alignment plugin.

1) Open the Star Alignment Plugin
2) Select the Raw Mosaic Image from the Seestar as the reference image.
3) Select the “Rigid Transformation” option.
4) Add the debayered files.
5) Select the output directory to store your registered images.
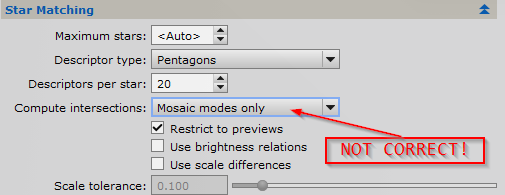
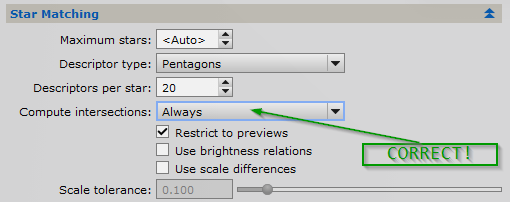
6) Under Star Matching, Select Compute intersections to Always. THIS IS IMPORTANT!
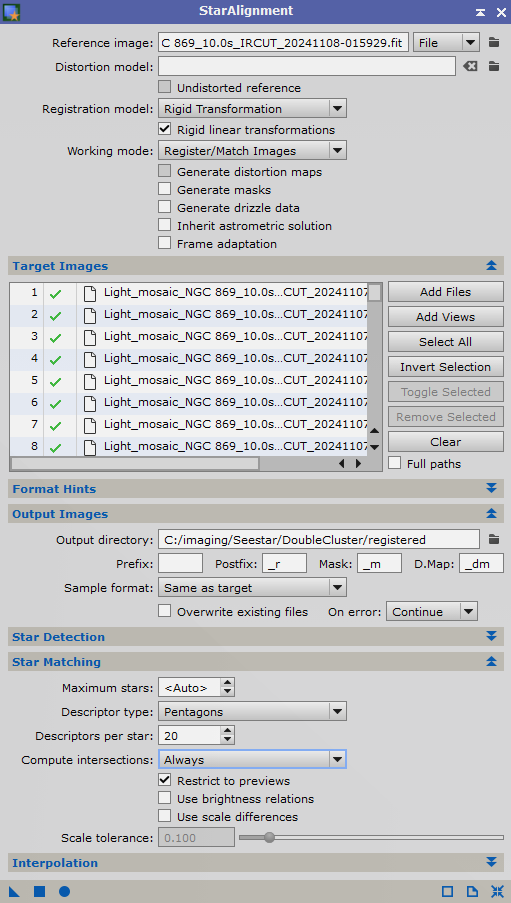
7) Select the Apply Global button (the round button at the bottom left).
Integration
The final step is to stack the registered files.
1) Open the ImageIntegration plugin.
2) Add the registered files from the previous step.
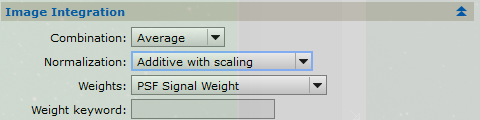
3) For Combination, select Average.
4) For Normalization, select Additive with scaling (This is important! You cannot use local normalization)
5) The rest of the options can remain the same.
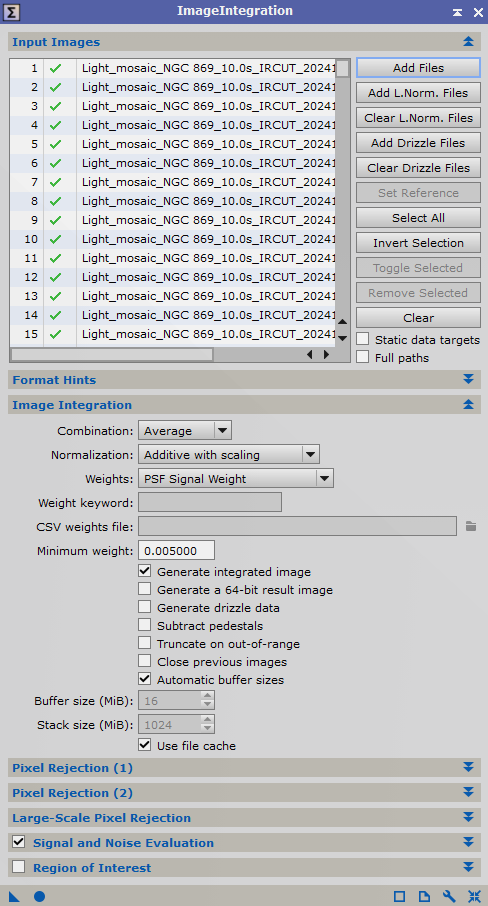
6) Select the Apply Global button (the round button at the bottom left).
Final Result
The final result will look similar to this
(STF applied). Processing can proceed as normal.

Here is the same image, STF Stretched, rotated 90 degrees counter-clockwise, and color calibrated).

Problems and Solutions
Integration Issues
If you find your picture looking similar to this:

It means that during the integration, the Image Integration Parameters were not set properly. The correct parameters:
Registration Issues
If you get errors for many of the frames during registration such as the following:
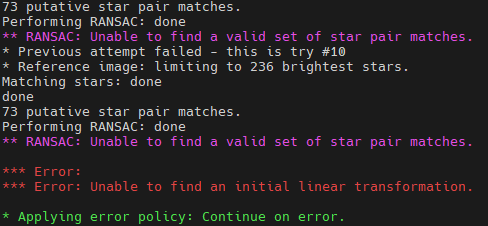
This means that the Computer Intersections was not set to always. Make sure the parameters are set to the following in StarAlignment.
I hope this helps you enjoy your Seestar even more using the new Mosaic mode. Special thanks to The Space Koala for discovering this technique of stacking the Mosaic images in Pixinsight! Please check out their Youtube page for excellent videos about Astrophotgraphy and Amateur Astronomy.