To be fair, I am not the first to do this. I am part of various online communities around the Radiacode and saw this. I wanted to write up an article that shows you how to do this.
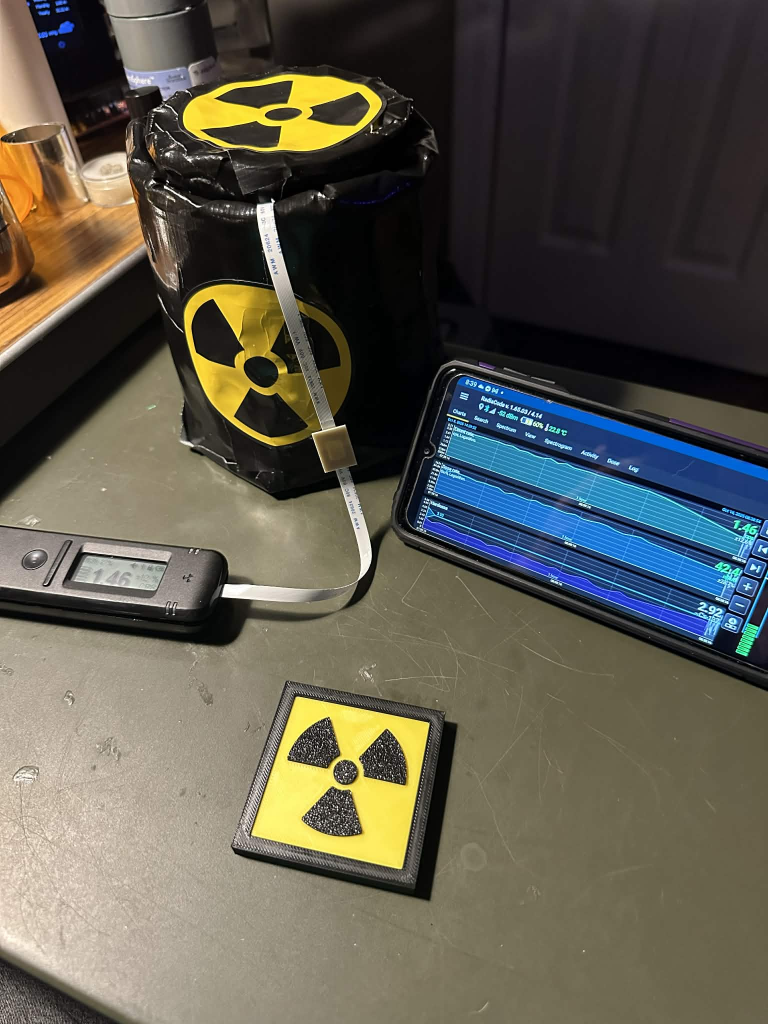
When gathering spectra on weak sources, lowering the background radiation is essential to capture weaker signals. Taking a background and subtracting it from your spectra does a good job, but sometimes you may want to make the background as minimal as possible. This is where you use what is called a Lead Castle.
I purchased some Lead Pigs on EBay and as an experiment, put the Radiacode inside of it to see just how much lower the background can get with it. It got pretty low!
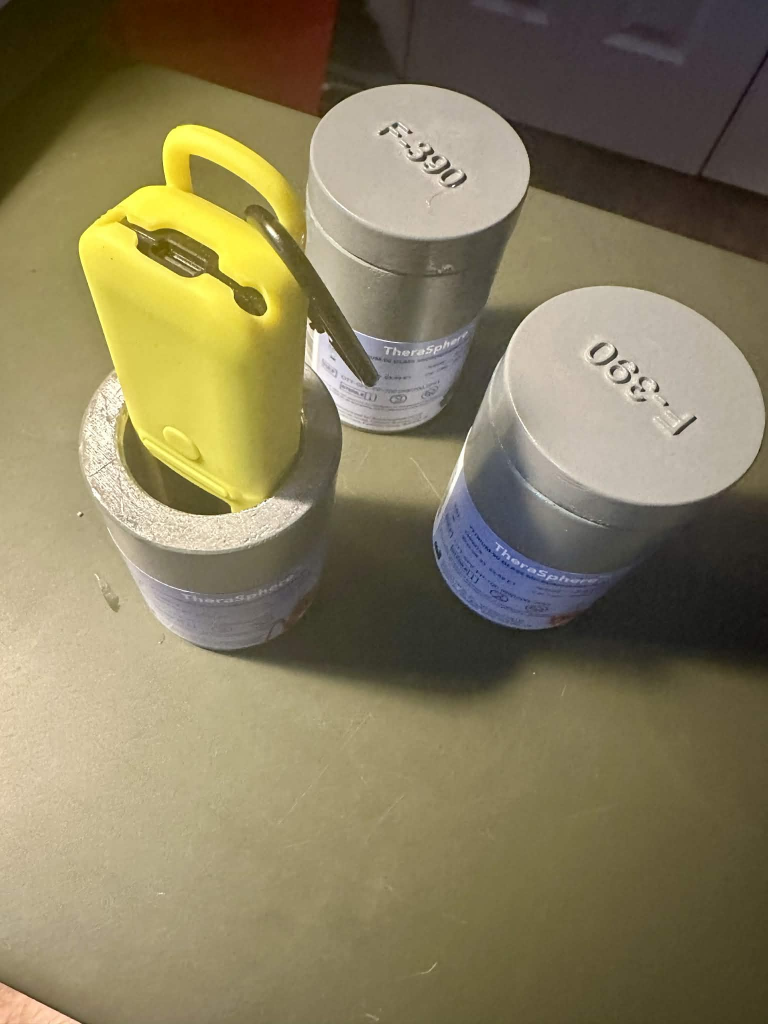
However, there was not enough room to put a sample in the pig with the Radiacode. Someone on one of the online chat groups suggested that the detector can be “remote”. Doing a little searching I found what I needed to do.

First: Do this at your own risk! If you are not familiar with electronics or don’t feel comfortable doing this then don’t do it! You could damage your Radiacode and likely void any warranty if you proceed!
Supplies
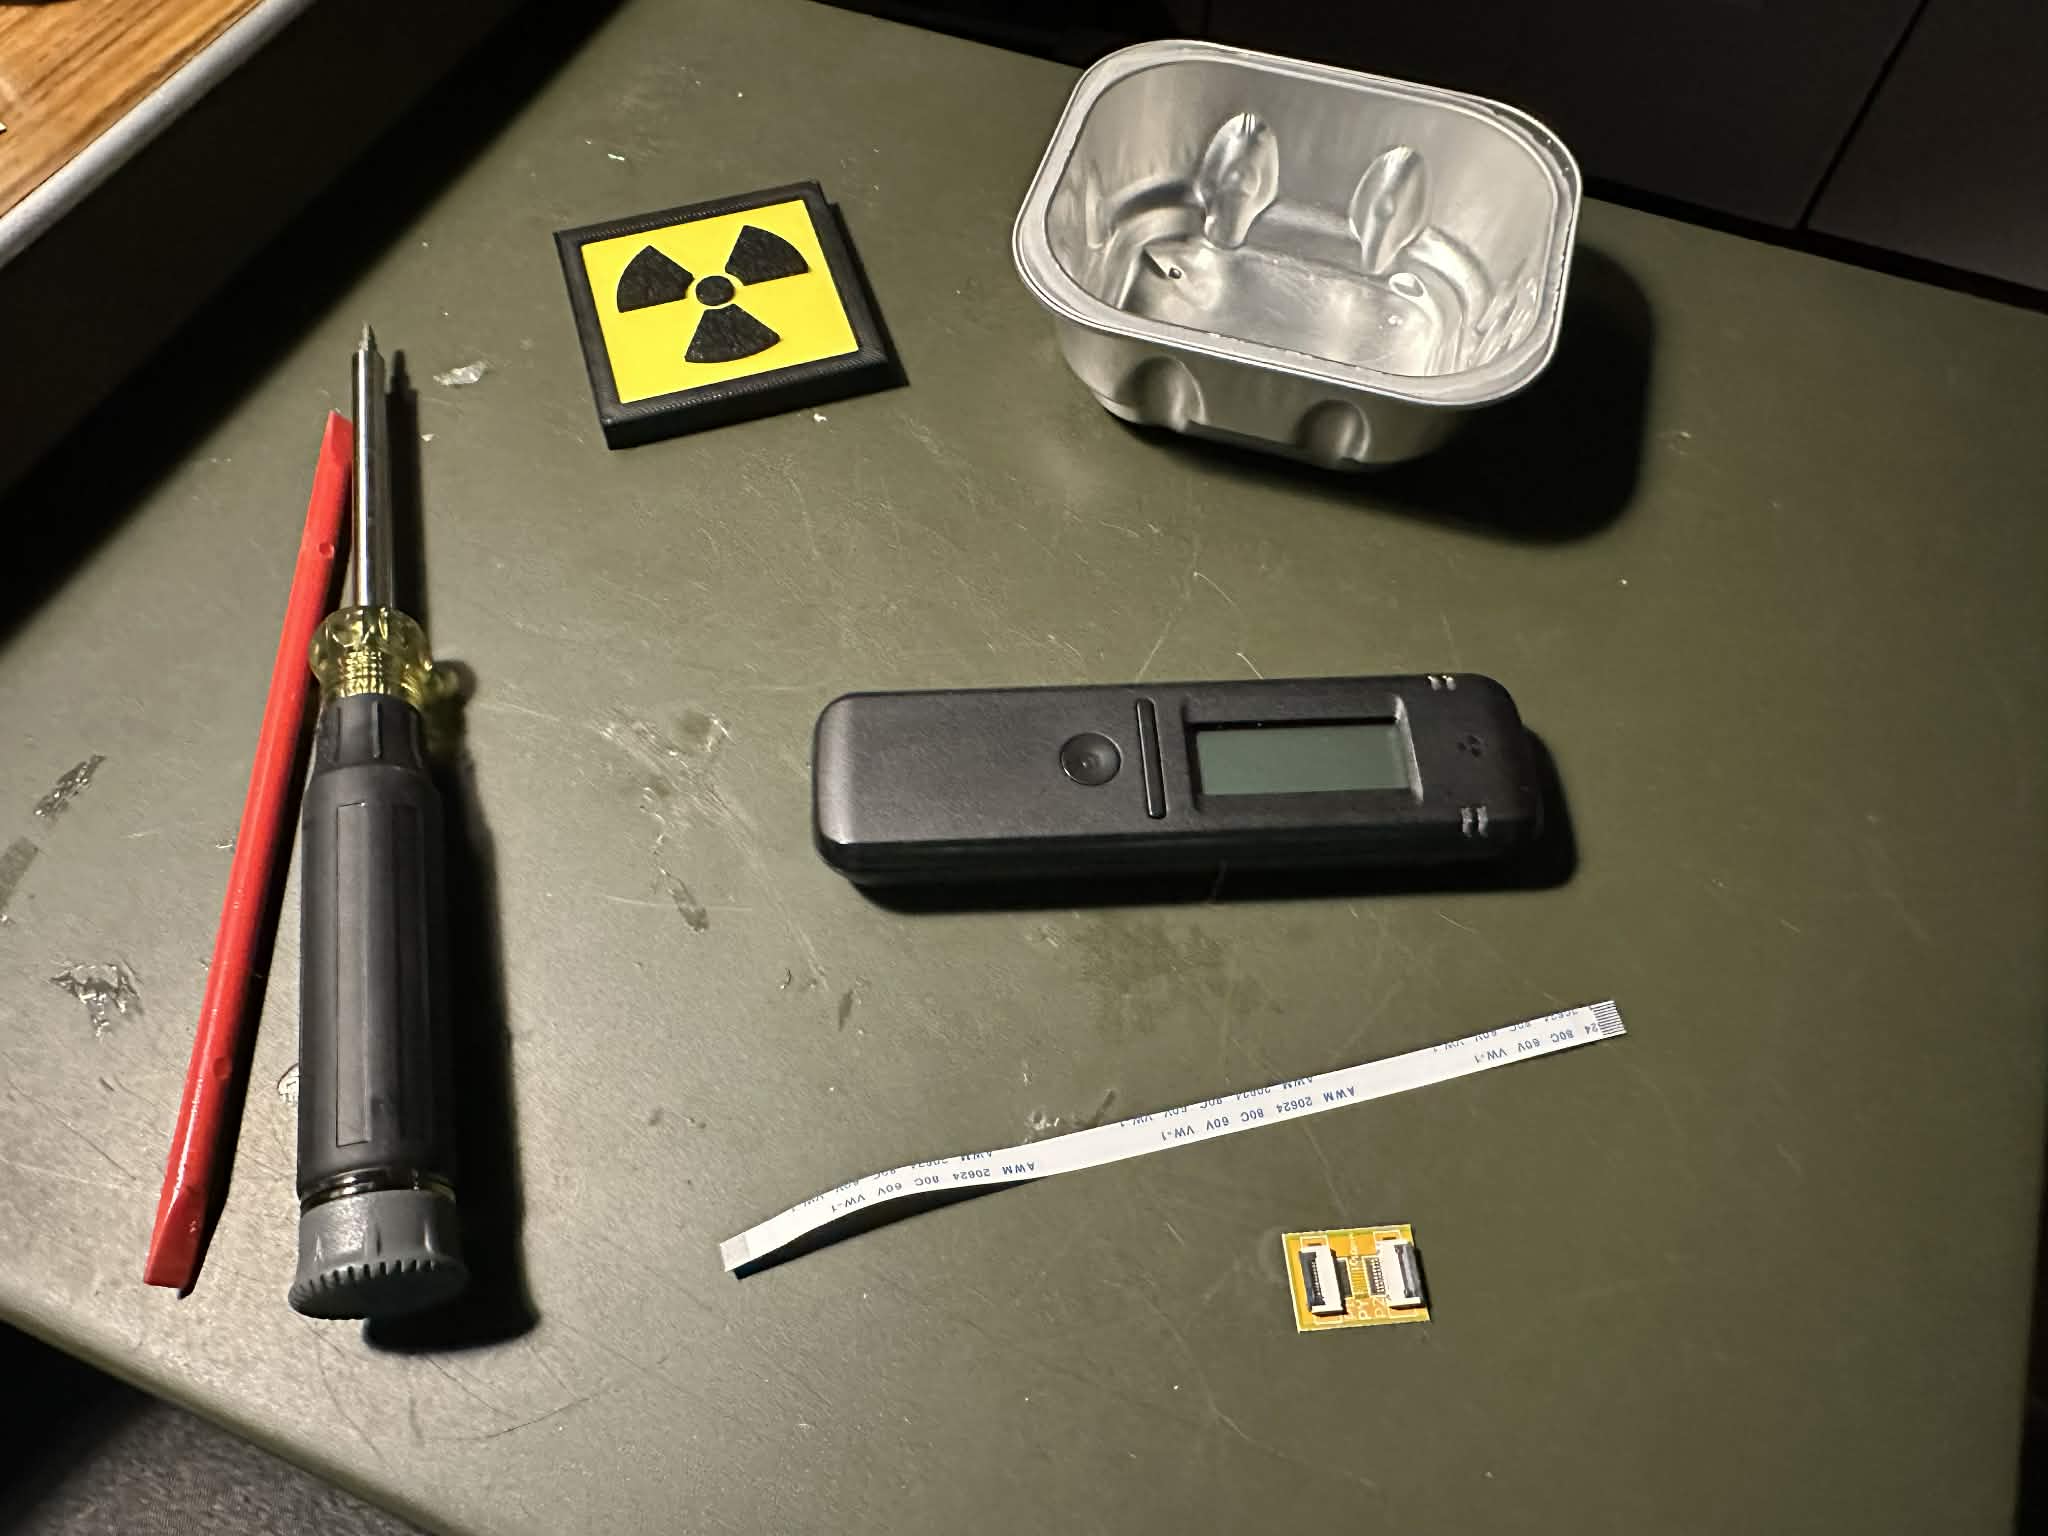
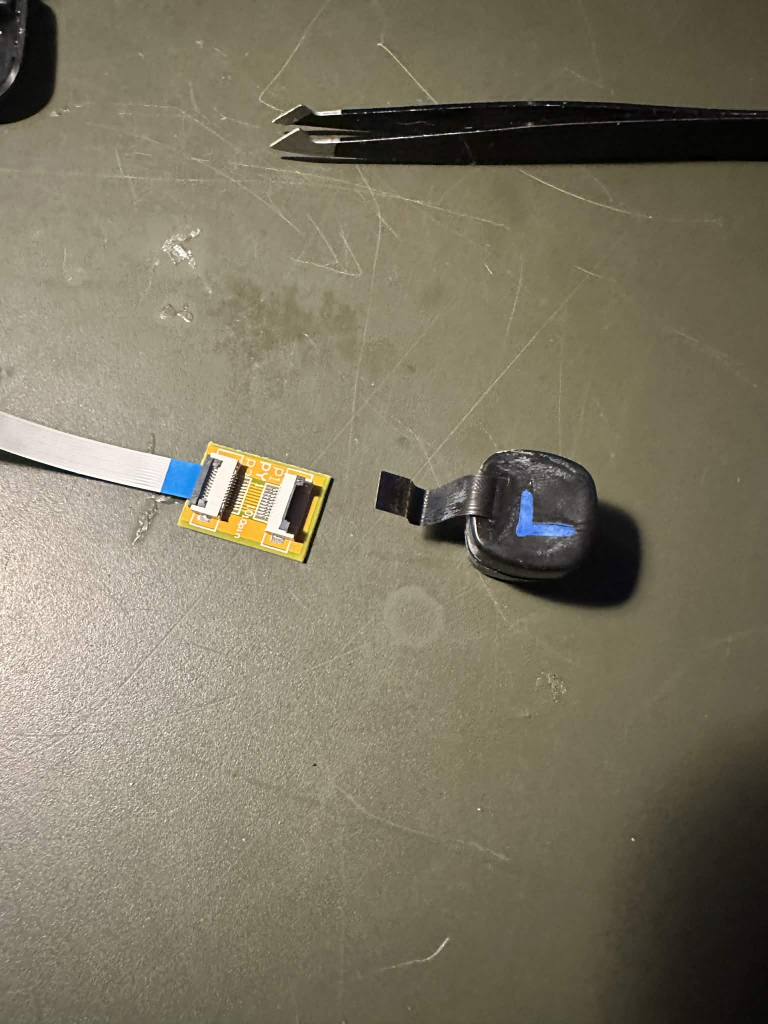
The Radiacode uses a 10 pin, 0.5mm pitch, Flexible Flat Cable to connect the scintillation detector to the main board. You will also need an FFC extender board to mate the detector to the cable. I got these off of Amazon:
FFC Cable – 10 pin, 0.5mm pitch
FFC Extenter – 10 pin, 0.5mm pitch
You will need a small Phillips screwdriver and some kind of plastic tool or toothpick.
Disassembly of the Radiacode
The Radiacode case snaps together. You can use your fingernail, toothpick, or plastic tool to open the case. I try not to use anything metal as this can scratch or break the case. Be careful opening the case as the battery is on the backside and the wires can pull out of the connector on the main board.
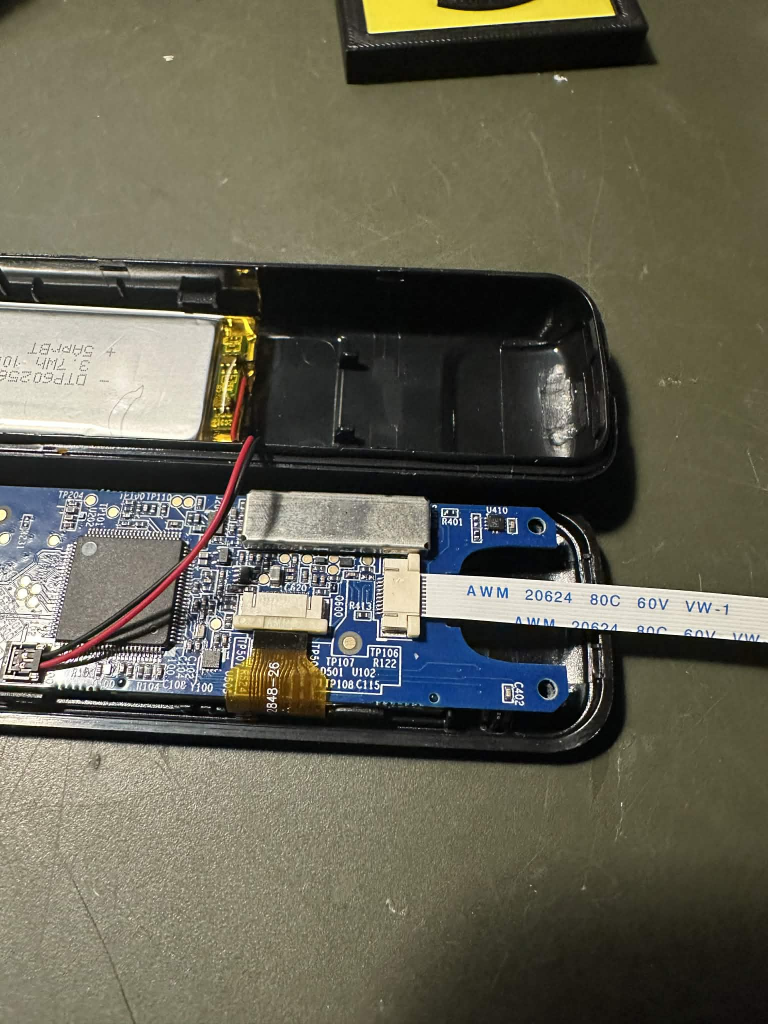
There are four screws that hold the main board onto the case. You will need to remove them as the main board needs to be lifted off of the front case slightly to remove the detector.
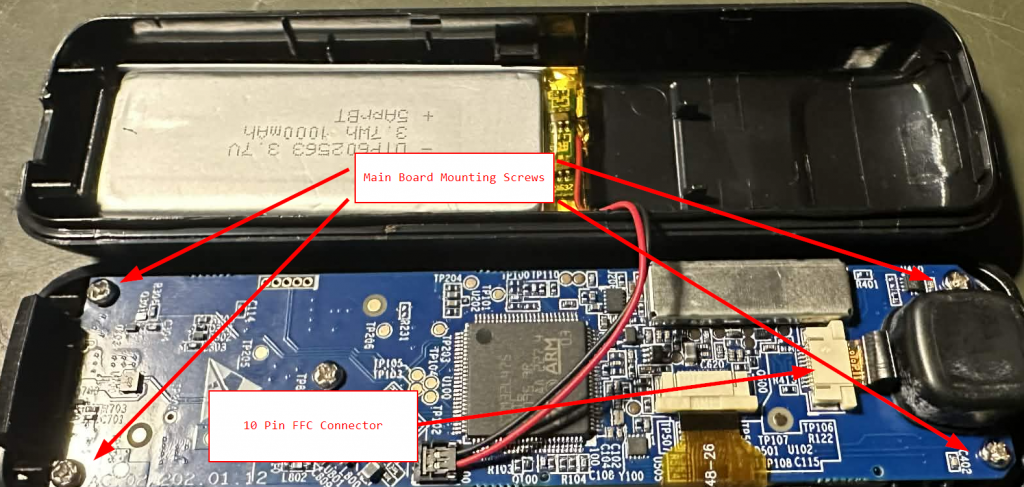
To disconnect the detector, use your NON-METAL tool to push the tabs of the 10 pin connector towards the detector.
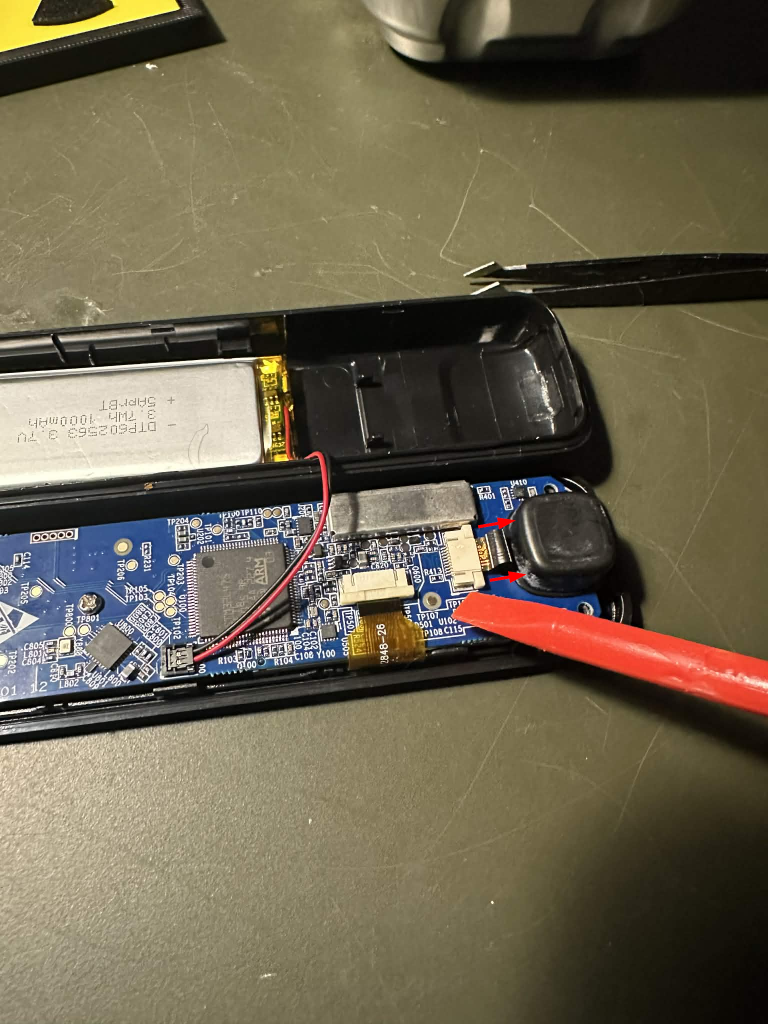
Gently remove the detector away from the main board while the main board is lifted slightly to clear the case.
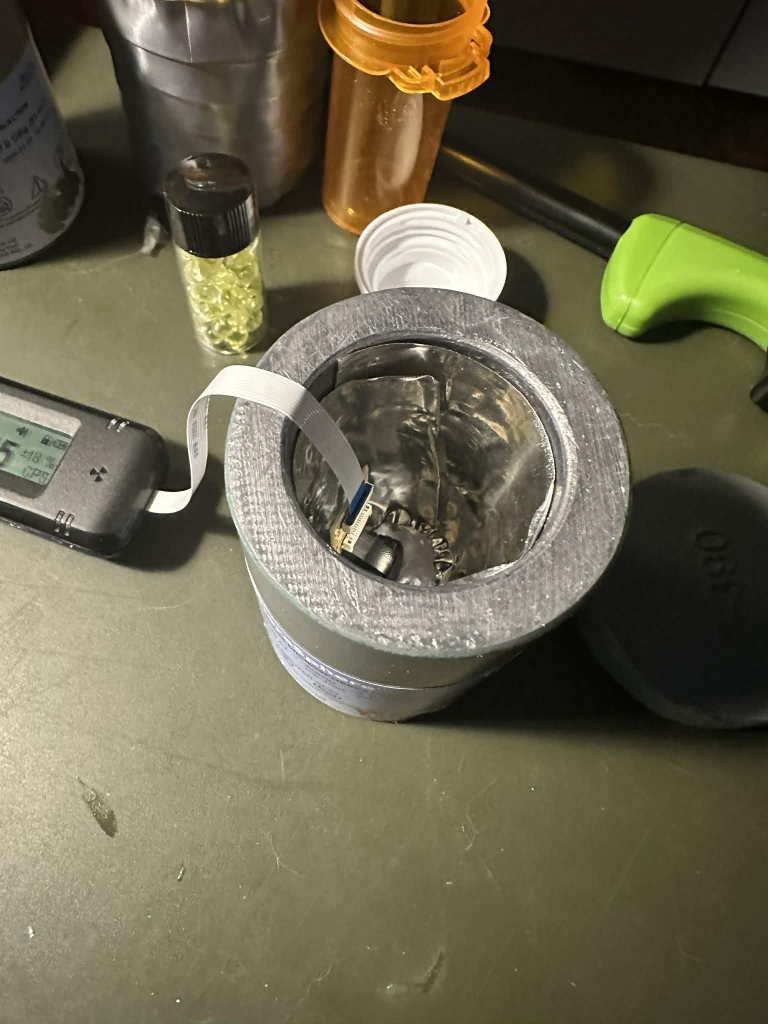
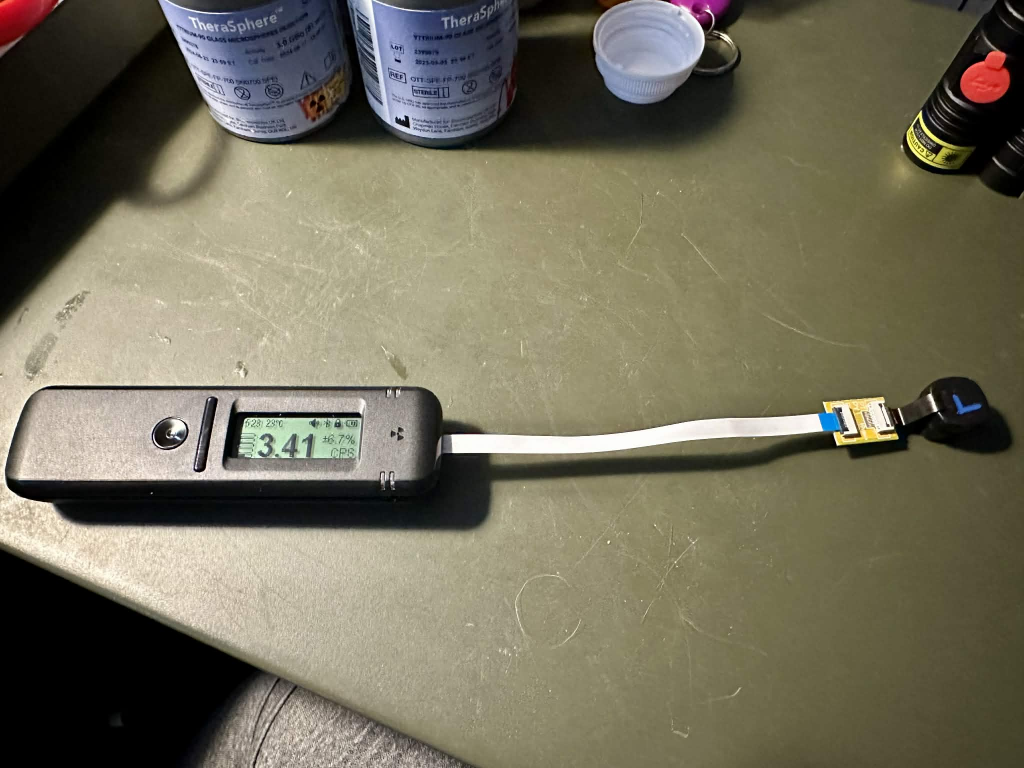
Once removed, you can attach it to the extender board. The tab on the extender board lifts up on a small hinge. The metal side of the 10 pin FFC cable on the detector needs to be facing DOWN. Make sure the FFC cable is all the way into the connector before flipping the tab down.
On the main board connector, the metal side of the FFC cable needs to be facing UP. Insert the FFC cable all the way in and slide the tab back away from where the detector was.
You can add extra FFC cables and extenders if desired as I did.
Gently place the top cover on top of the bottom cover BUT DON’T SNAP THEM TOGETHER!! You don’t want to connect the two halves because the FFC cable will be in the way.
Another note of warning: Be careful not to short any connections to metal. The Radiacode does not like that.
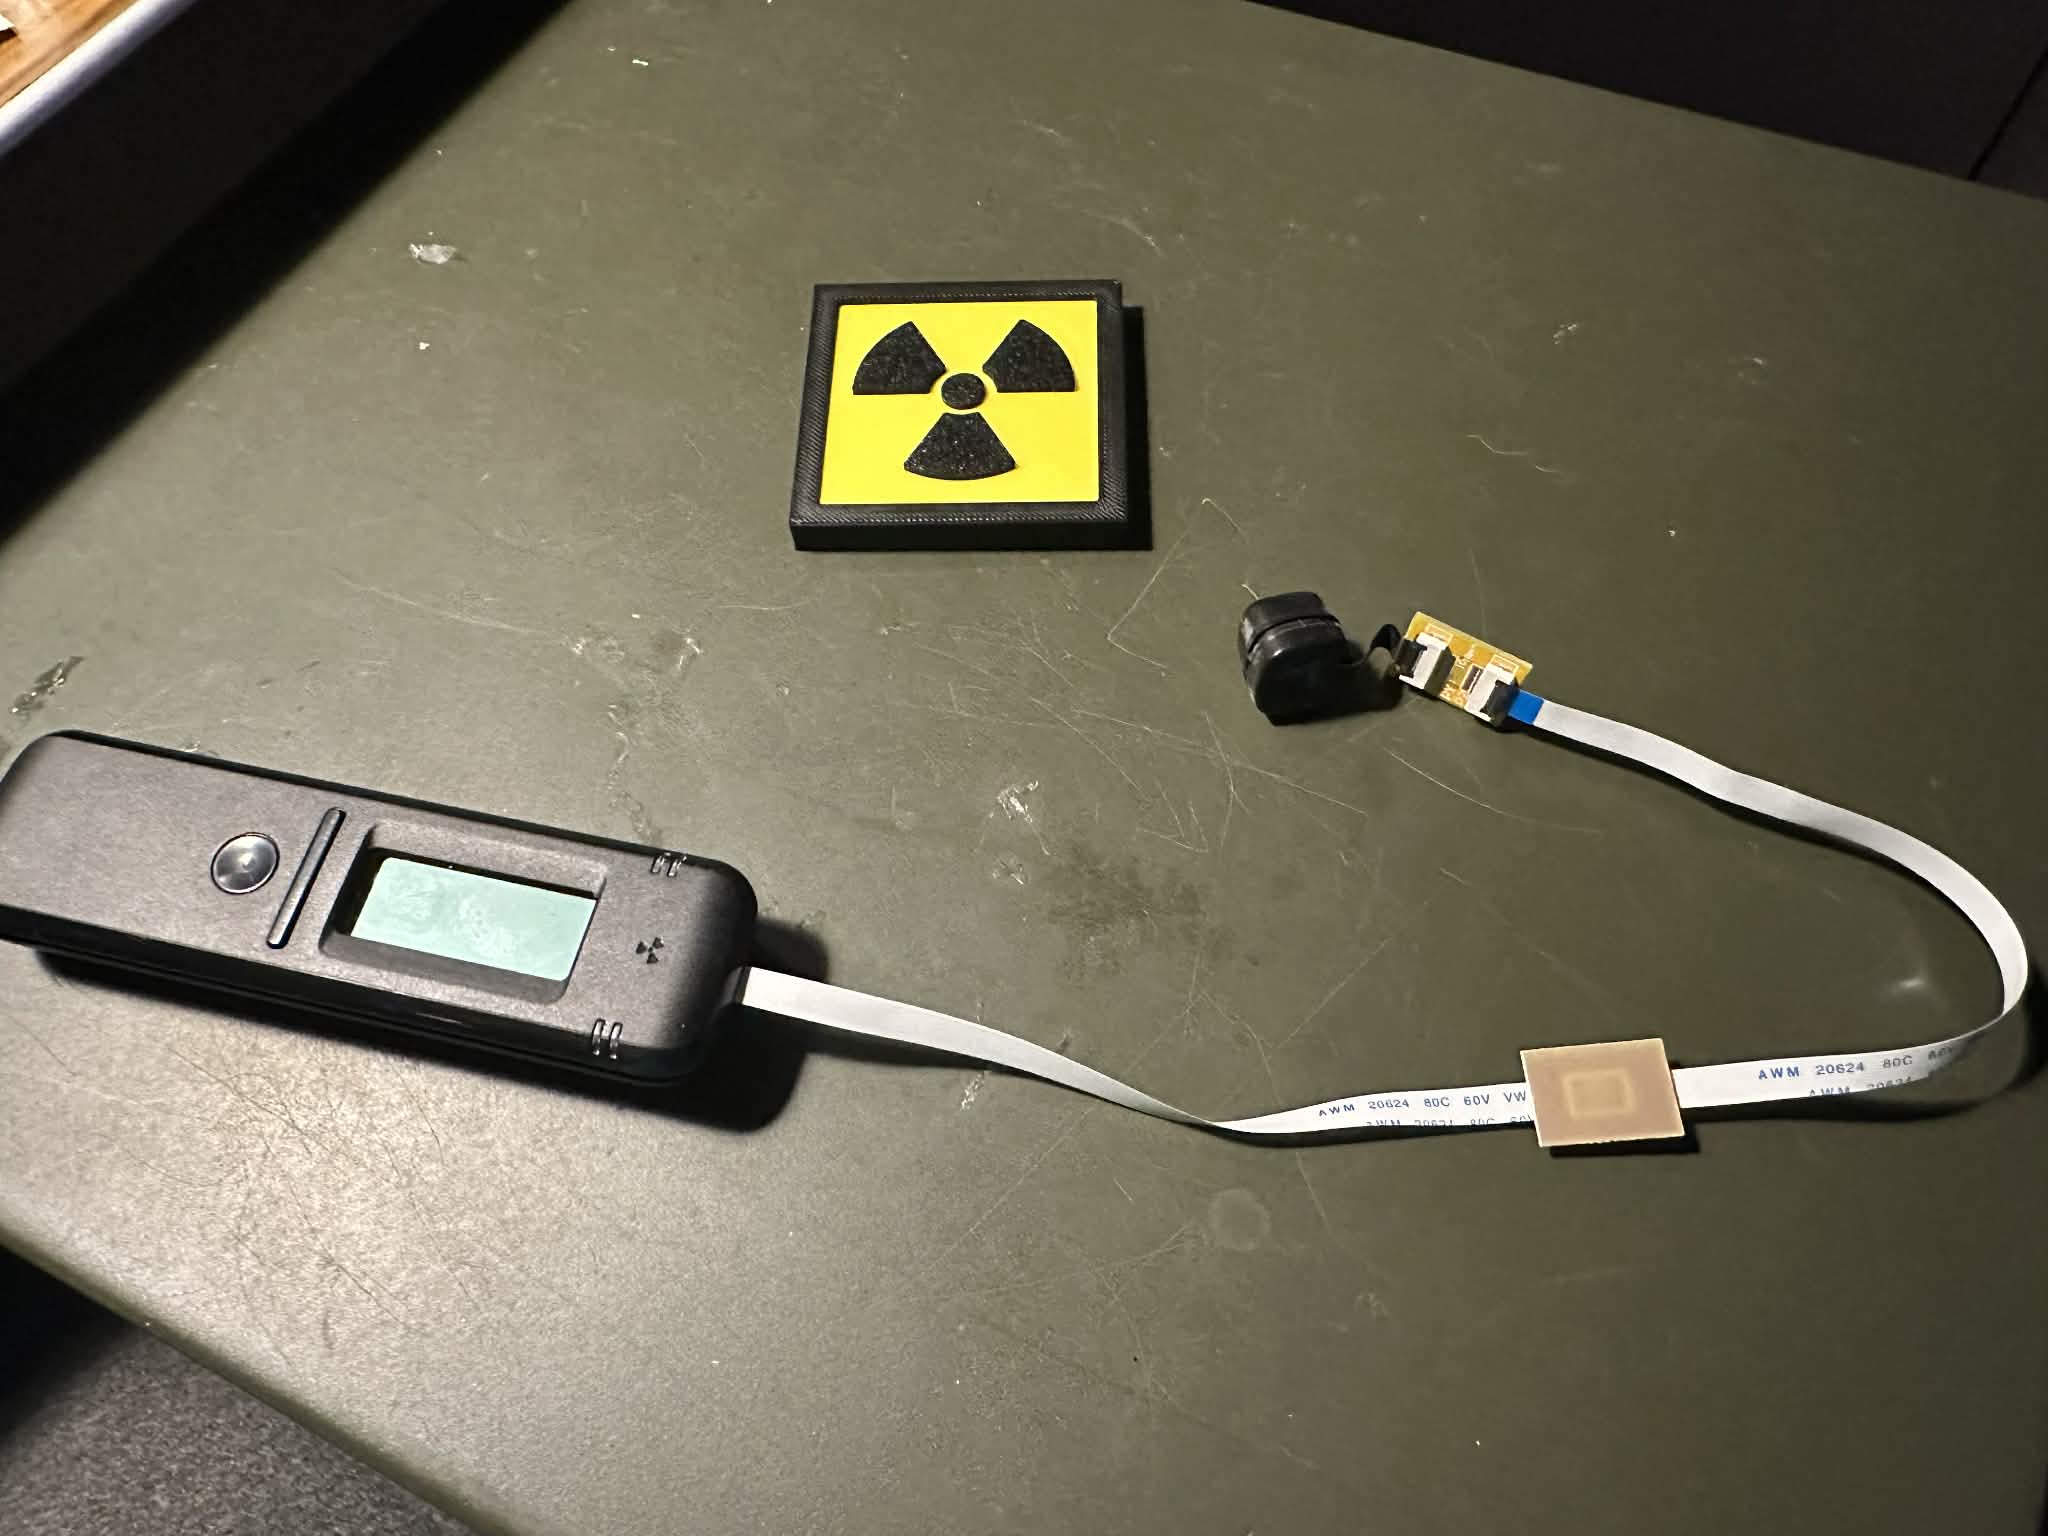
Turn on the Radiacode and if everything was done correctly, it should work fine.