
In the previous section of this tutorial, we installed all of the required tools and plugins. In this section, we will begin by illustrating how to stack your images in Pixinsight.
Setting up Working Directories
One of the activities I do is set up directories where I will be processing all of my astroimages. This helps me keep all my data consistent and allows me to synchronize which system I am on to a backup directory.
In this tutorial, we will be using a root folder called Imaging. Since I use a Windows machine, I will be using C:\images, but you can use whatever folder you want. Follow these steps:
- Create a directory for all of your image work (c:\imaging)
- Create a directory for each imaging system you use
- c:\imaging\seestar
- c:\imaging\dwarf2
- c:\imaging\origin
- c:\imaging\rig (this is what I use for my main imaging rig)
- Create a directory for the object you imaged
- c:\imaging\seestar\m8
- Create a directory for your sub frames
- c:\imaging\seestar\m8\subs
- Copy sub-frames from Seestar to the subs directory
Stacking with Weighted Batch Pre-Processing (WBPP)
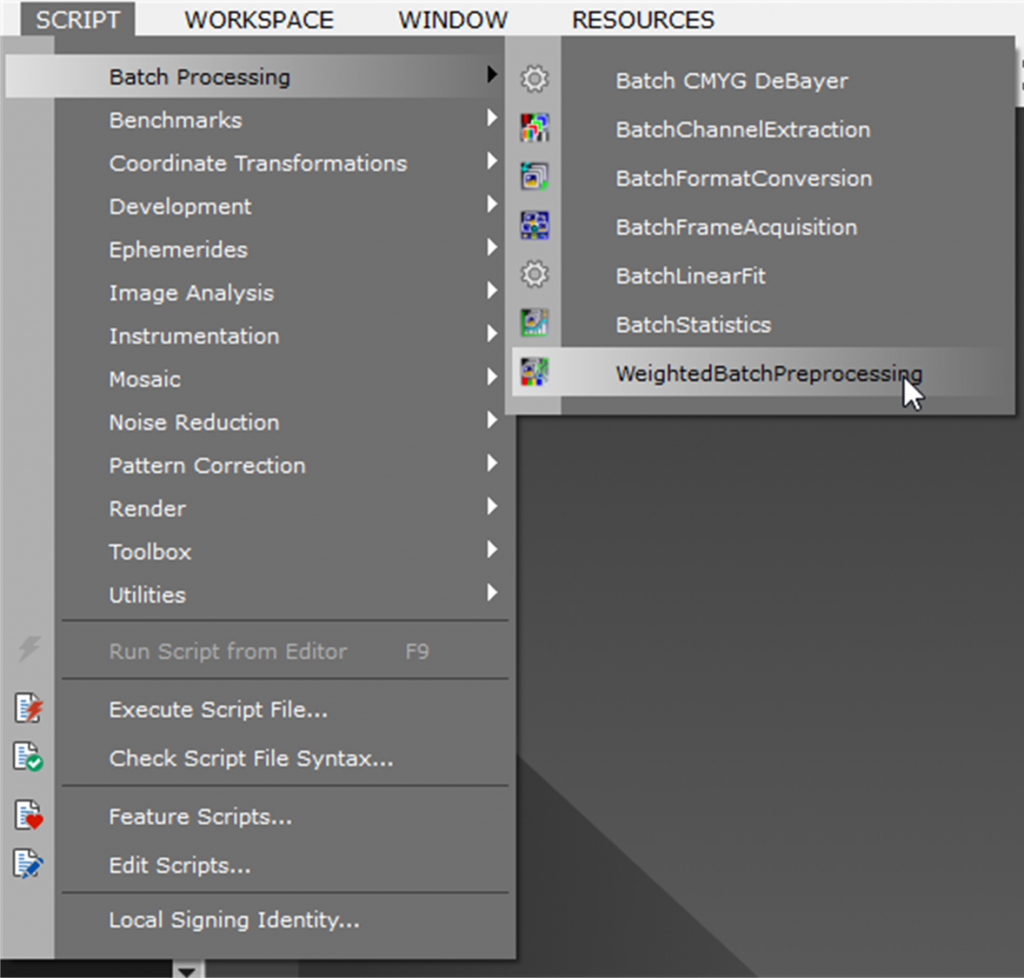
Open Weighted Batch Pre-Processing under Script->Batch Processing->WeightedBatchPreprocessing
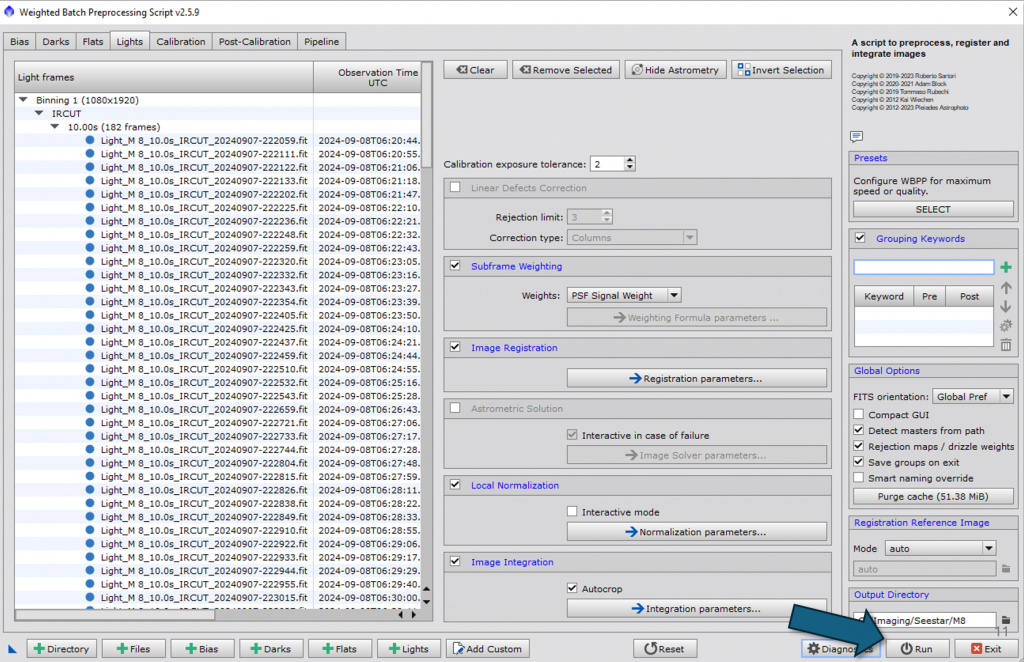
1) Select the Lights Tab
2) Select the Lights Add Button and select all of the subframes in the subs directory
3) Select the output directory (c:\imaging\seestar\m8)

You should see something like this. Select the “Run” button to begin the process.
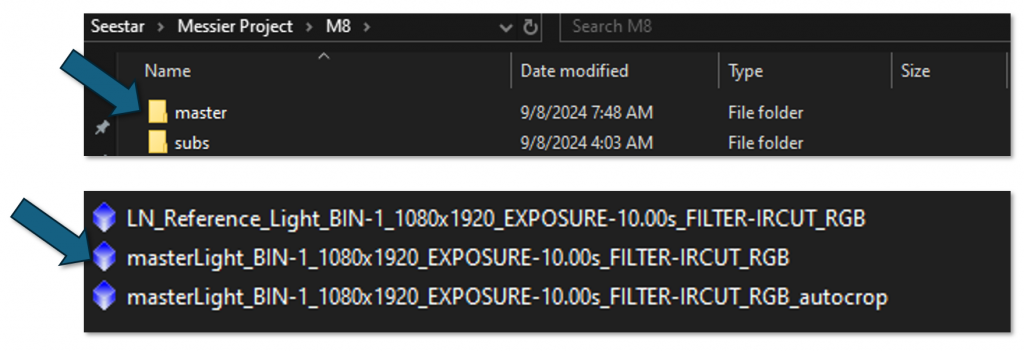
Once Processing completes, you will see new directories appear under c:\imaging\seestar\m8. Select the folder that says master, and open the indicated file (masterLight_BIN-1_1080x1920_EXPOSURE-10.00s_FILTER-IRCUT_RGB)
When the file is opened, you will see three windows appear in Pixinsight.
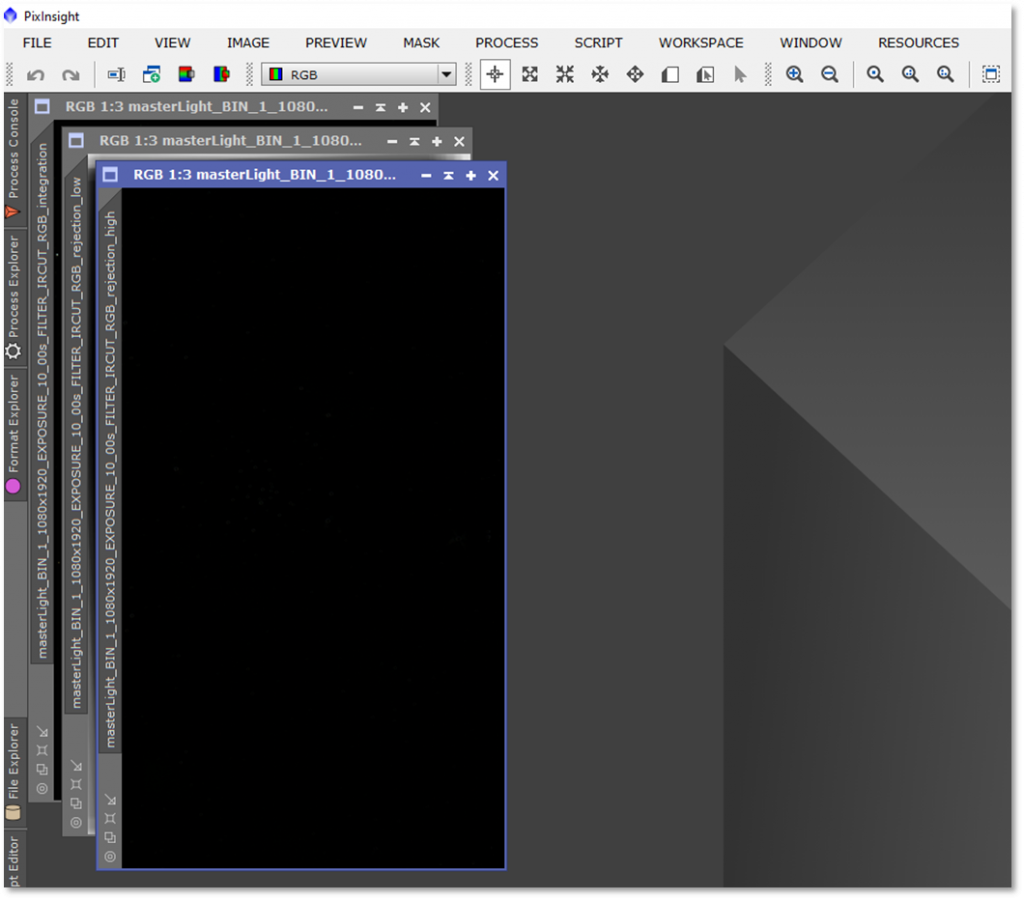
The three windows are:
- Master Light (this is the stacked file)
- Master Light Rejection Low (shows you the field rotation)
- Master Light Rejection High (this usually will show anything like satellite or airplane lines)
You can close the Rejection High and Low images as they will not be used for processing.