
My imaging rig has been through a few versions over the years and it is fun to look back on the different versions and the results I was able to achieve. During this time, I have learned a great deal about this aspect of the hobby as well as improved my abilities at processing the final result.
One truth I have come to realize: learn with what you have first, then upgrade. Expensive equipment won’t do very well if the time is not taken to work your way up. There is no need to spend a great deal of money on a rig if you don’t have a good foundation.
Version 1.0
My first serious foray into the world of Astroimaging was back in 2005 with an SBIG ST7 and a Celestron Ultima 2000. Back then, my pictures were strictly black and white and my processing was done in ImagesPlus which for the time was pretty advanced. I also did some post processing in Adobe Photoshop. The setup was pretty good, for me, and I got some nice results with it.
I proceeded to do more imaging with it, but I became frustrated and decided to leave imaging and sold my gear. Thus began my telescope and mirror making phase.
Version 2.0
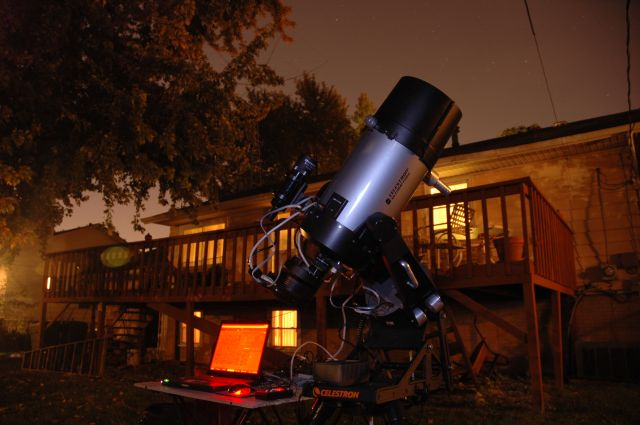
After this hiatus, I decided to get back into imaging and proceeded to start building up an imaging rig. This took some time. So in 2015 I picked up a Stellarvue SV80ED Raptor, a Celestron Advanced GT CG5 mount, and an Orion G3 monochrome camera. This gave me similar capabilities to what I had before. This is about the time I picked up Pixinsight.
Version 2.5
I wanted to start doing LRGB imaging. In 2016, I purchased an Orion Nautilus Filter wheel and I had a set of Meade filters. This is when I began to learn more about processing LRGB images.
Version 3.0
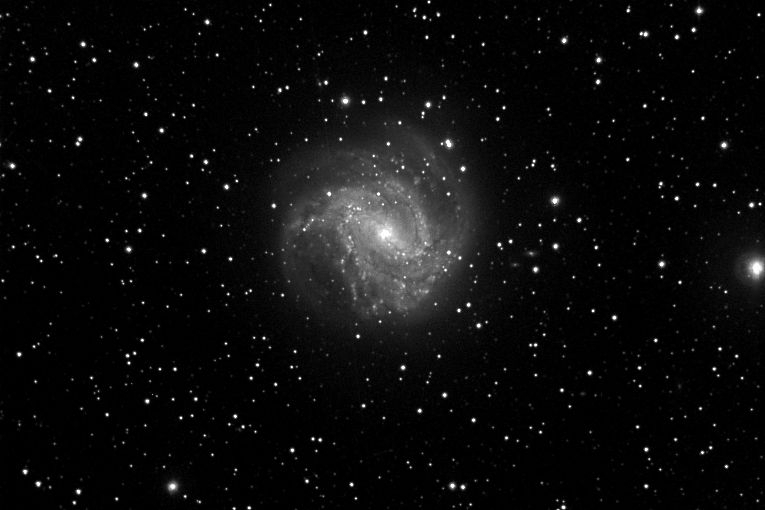
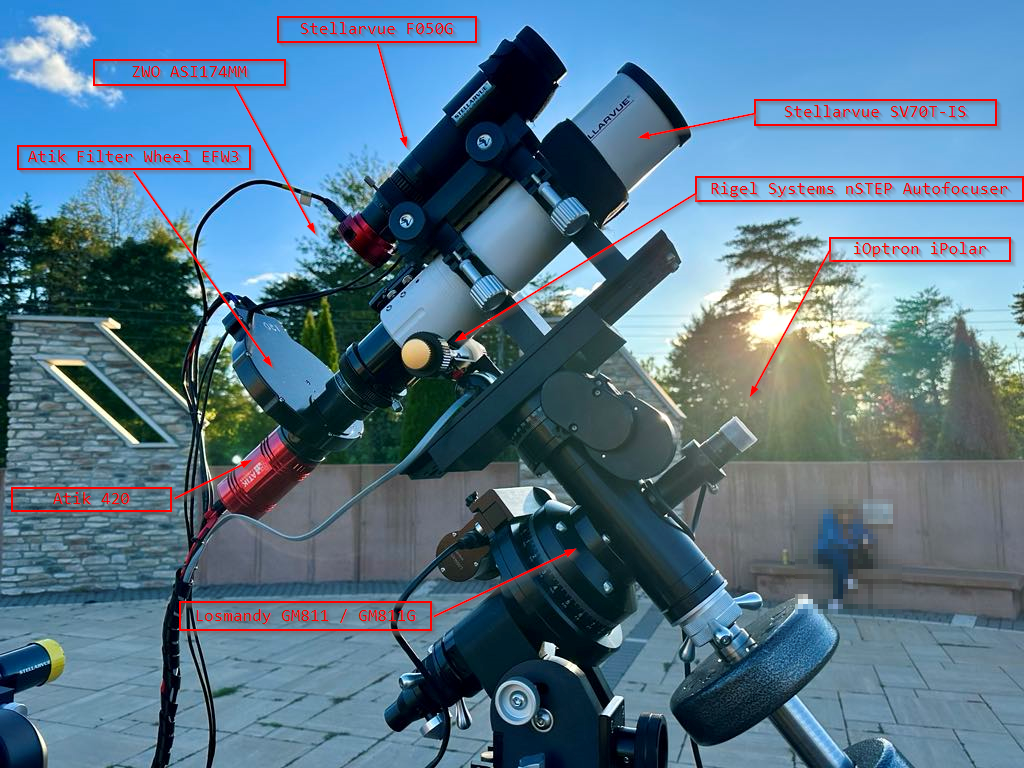
In 2017, I upgraded my entire setup with the addition of a dedicated imaging telescope, the Stellarvue SV70i, Stellavue 0.8 Focal Reducer, Hutech IDAS LPR Filter, Stellavue F050G, ZWO ASI174MM guide camera, Losmandy GM811G, Atik 420, and ZWO Filter Wheel. The filters I used were the Astronomik LRGB set with 12nm Ha filter. This proved to be my workhorse for about five years. About this time, I was getting really serious about my imaging asperations. I started learning more about Pixinsight and better processing techniques.
Version 3.5
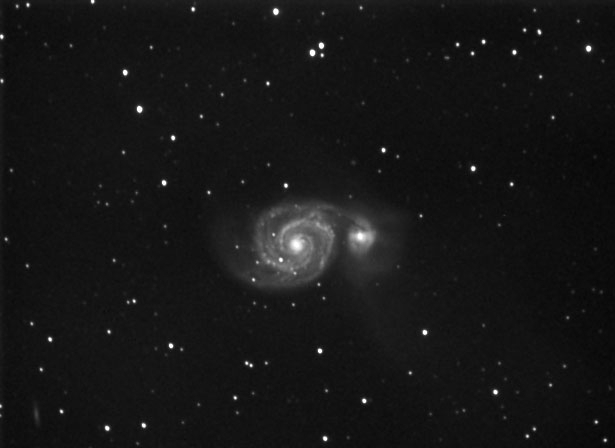
The final change in the imaging rig was the addition of an Atik filter wheel and Astrodon LRGB and Ha, OIII, and SII narrowband filters. This replaced the ZWO filter wheel and Astronomik filters. I want to try my hand at Narrowband imaging and get better at acquiring LRGB imaging.

Version 4.0 (70mm)
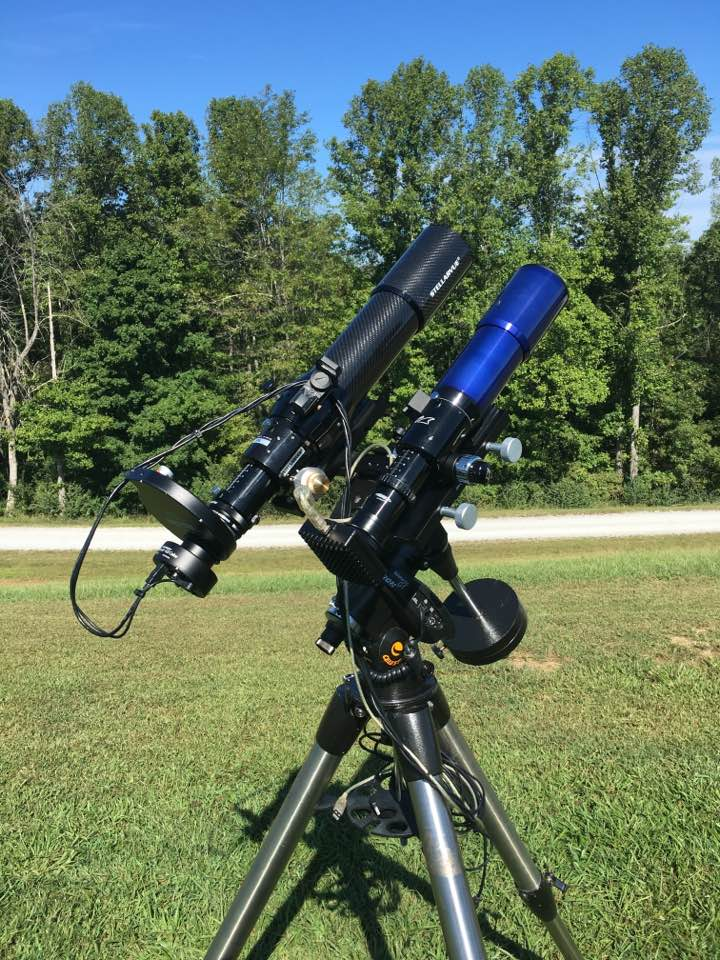
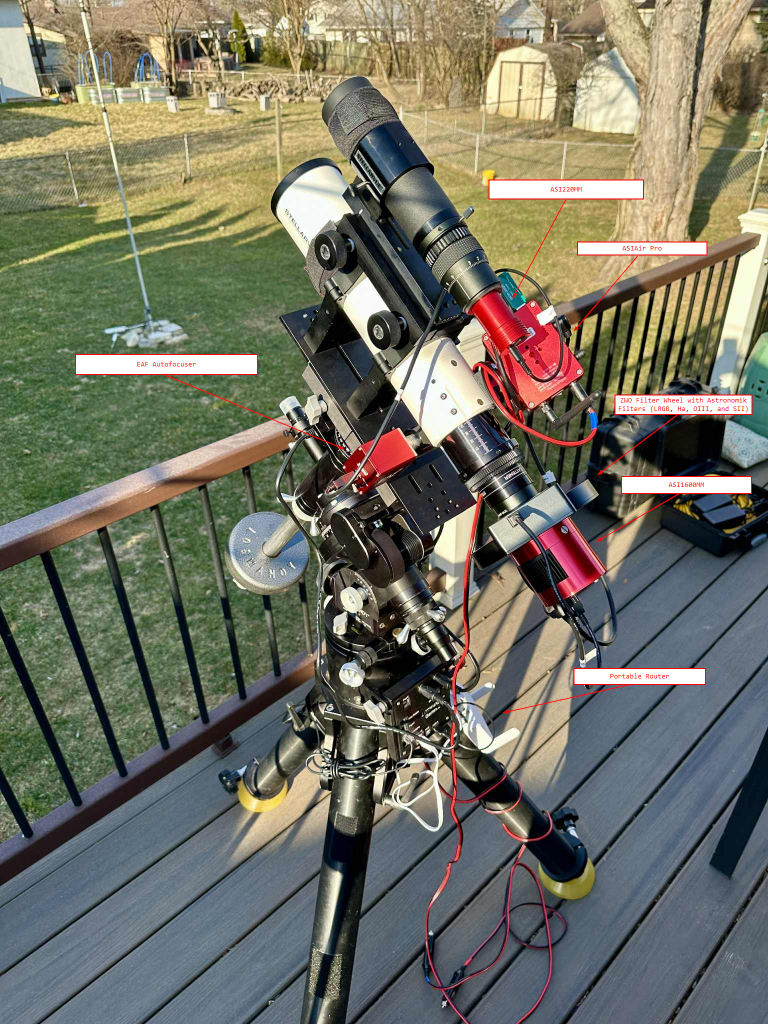
In early 2025, I was able to obtain an ASI1600MM from a fellow Astrophotographer friend, and this took me down the road of going full ZWO for the ecosystem they have. This allows my rig to be controlled much like the Seestar. It makes my data acquisition efforts much more efficient and repeatable. I acquired an ASIAir Pro, ASI221MM guide camera, EAF autofocuser, and since I already had a ZWO filter wheel, I acquired additional Astronomik 6nm Filters for OIII and SII.
Version 4.0 (115mm)
I have a 115mm Orion EON APO that has not been used very much. I decided to try it out and find out if the mount will be good enough to use this bigger telescope. It uses the same ZWO hardware as the 70mm, but with the larger telescope. This is when I also made it so the imaging setup can be easily moved from one telescope to another.
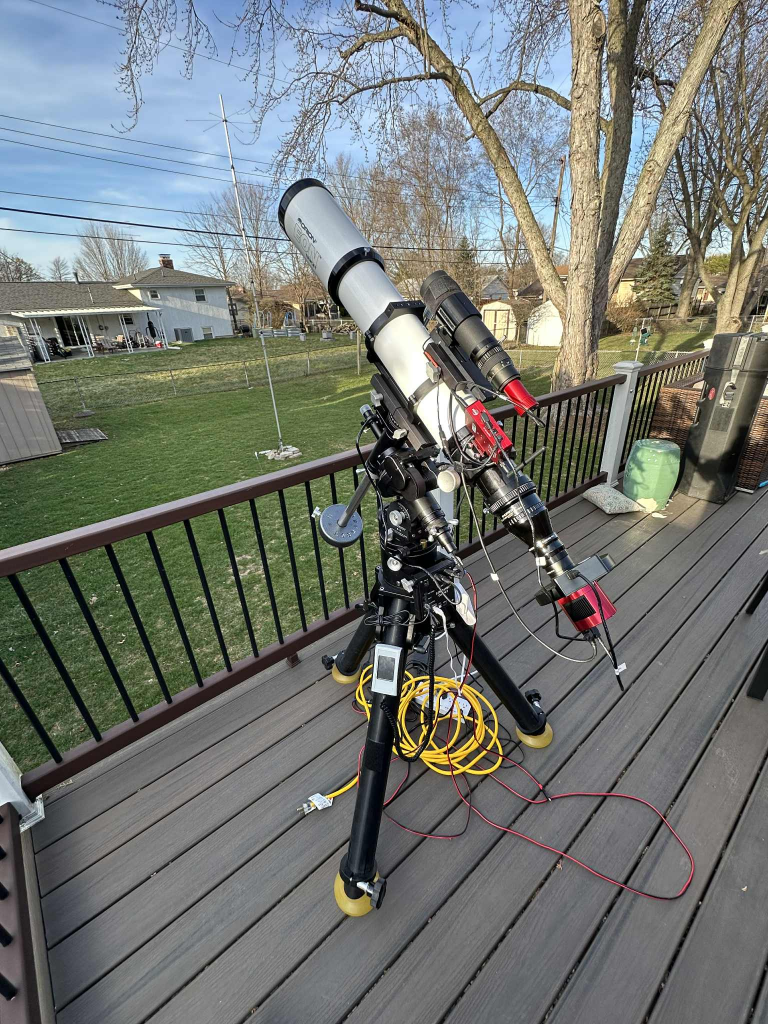
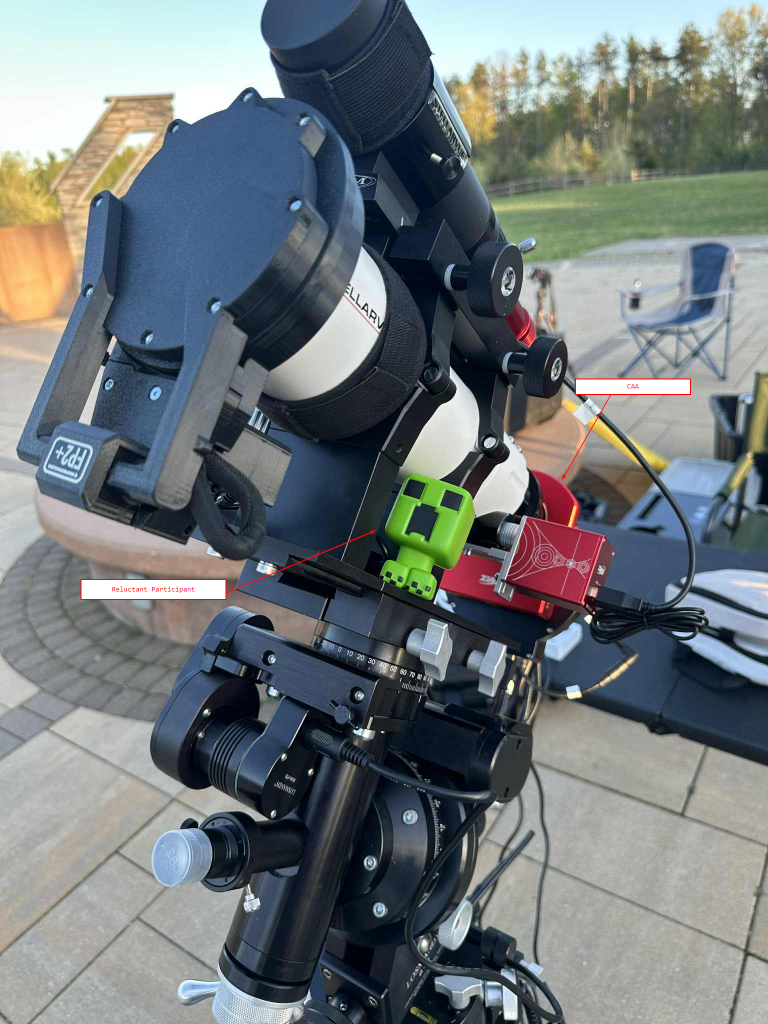
Version 4.5
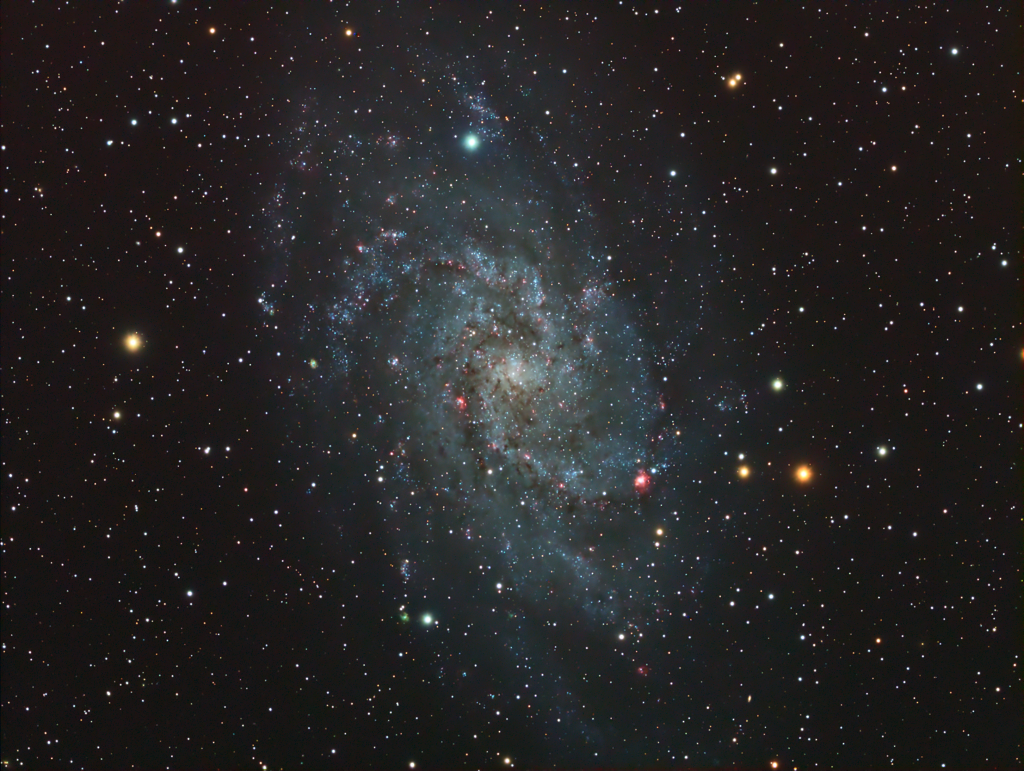
When the ZWO CAA came out, I wanted to have the flexibility of rotating the camera to match a field of view from previous sessions. I also wanted to be able to frame objects (such as M31) to be length wise to capture the entire galaxy. So version 4.5 was born.
Future Plans
I pretty much have the setup of my dreams, and I am not eager to change much of anything. I will probably build a more portable setup that takes less time to set up. This would include a Losmandy GM8 with Gemini and a color version of the ASI1600 if I can find one. But that is in the future.